Configure employee details in employee/team directory
Updated in February- 2024 | Subscribe to watch greytHR how-to video
Adding employee details in an employee/team directory refers to the process of inputting and maintaining information about employees within a directory or database in a software application. This directory serves as a centralized repository for employee information and enables easy access and retrieval of employee details.
The Employee Directory Config page in the greytHR Admin portal allows you to set your employees' information details in the employee and team directory. The details include your employees' contact details, designation, location, joining date, and date of birth. The configurations you make on the page reflect in the ESS portal of the employees and managers.
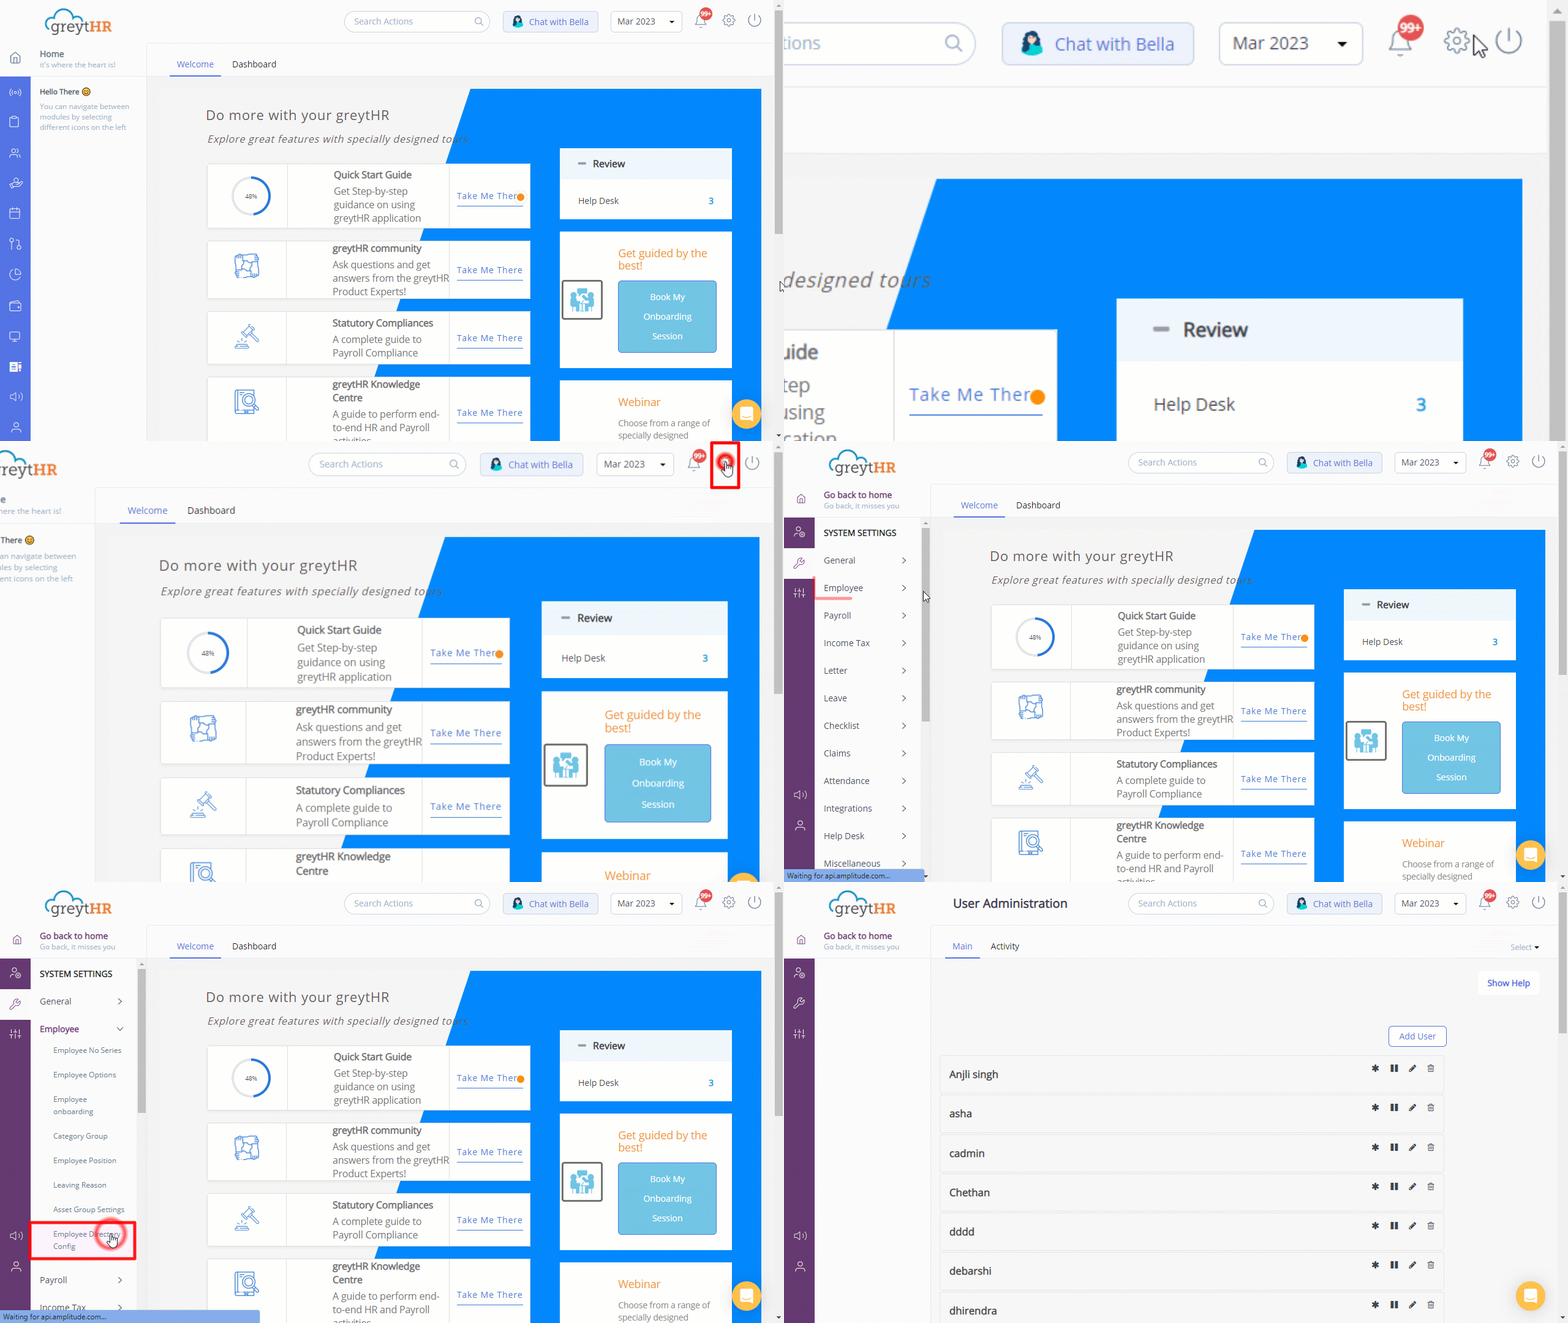
To view the Employee Directory Config page, click the Settings icon > System Settings > Employee > Employee Directory Config.

You can perform the following actions on the Employee Directory Config page:
Configure employee details in employee directory.
Configure employee details in team directory.
Configure employee details in employee directory
To configure employee details in the employee directory, perform the following actions:
On the Employee Directory Config page, under the Employee Directory tab, in the Contact Details section, select the required check box(es) such as Extension No, Mobile, Emergency Contact No, and Email ID.
In the Category section, select the required check box(es) such as Designation, Department, Grade, Location, and Multi Media.
In the Other Information section, select the required check box(es) such as Joining Date, Date of Birth, Status, Reporting To, Blood Group, Nationality, Marital Status, and Annual CTC.
Note: You can view your selections as Sample Data on the page. You can also drag and drop the options under each section as per your requirements.
Click Save. A success message appears.
Note: The information you disclose in Employee Directory is visible to all the employees in their respective ESS portals. From the greytHR ESS login, employees can navigate to Home > People > Everyone tab to view the employees' details.
Configure employee details in team directory
To configure employee details in the team directory, perform the following actions:
On the Employee Directory Config page, under the Team Directory tab, in the Contact Details section, select the required check box(es) such as Extension No, Mobile, Emergency Contact No, and Email ID.
In the Category section, select the required check box(es) such as Designation, Department, Grade, Location, and Multi Media.
In the Other Information section, select the required check box(es) such as Joining Date, Date of Birth, Status, Reporting To, Blood Group, Nationality, Marital Status, and Annual CTC.
Note: You can view your selections as Sample Data on the page. You can also drag and drop the options under each section as per your requirements.
Click Save. A success message appears.
Note: The information you disclose in Team Directory is visible only to the managers in their respective ESS portals. From the greytHR ESS login, managers can navigate to Home > People > My Team tab to view the team members' details.
Other related links:
Was this article helpful?
More resources:
▶ Video - Watch our how-to videos to learn more about greytHR.
❓ FAQs - Solve your queries using FAQs.
📢 Product Update - Read about the product updates.