Configure automatic cut-off date
Updated in September- 2024 | Subscribe to watch greytHR how-to video
After creating the category for the customers, to exchange the data, you must select the cut-off date. The Lock Configuration page in the greytHR Admin portal helps you, as Payroll Service Provider (PSP) to configure a cut-off date. The cut-off date helps you to set a deadline for your customers to upload the inputs. After the configuration, the system locks the category automatically on the cut-off date. The option disables your customers from adding the inputs or making changes after the cut-off date.
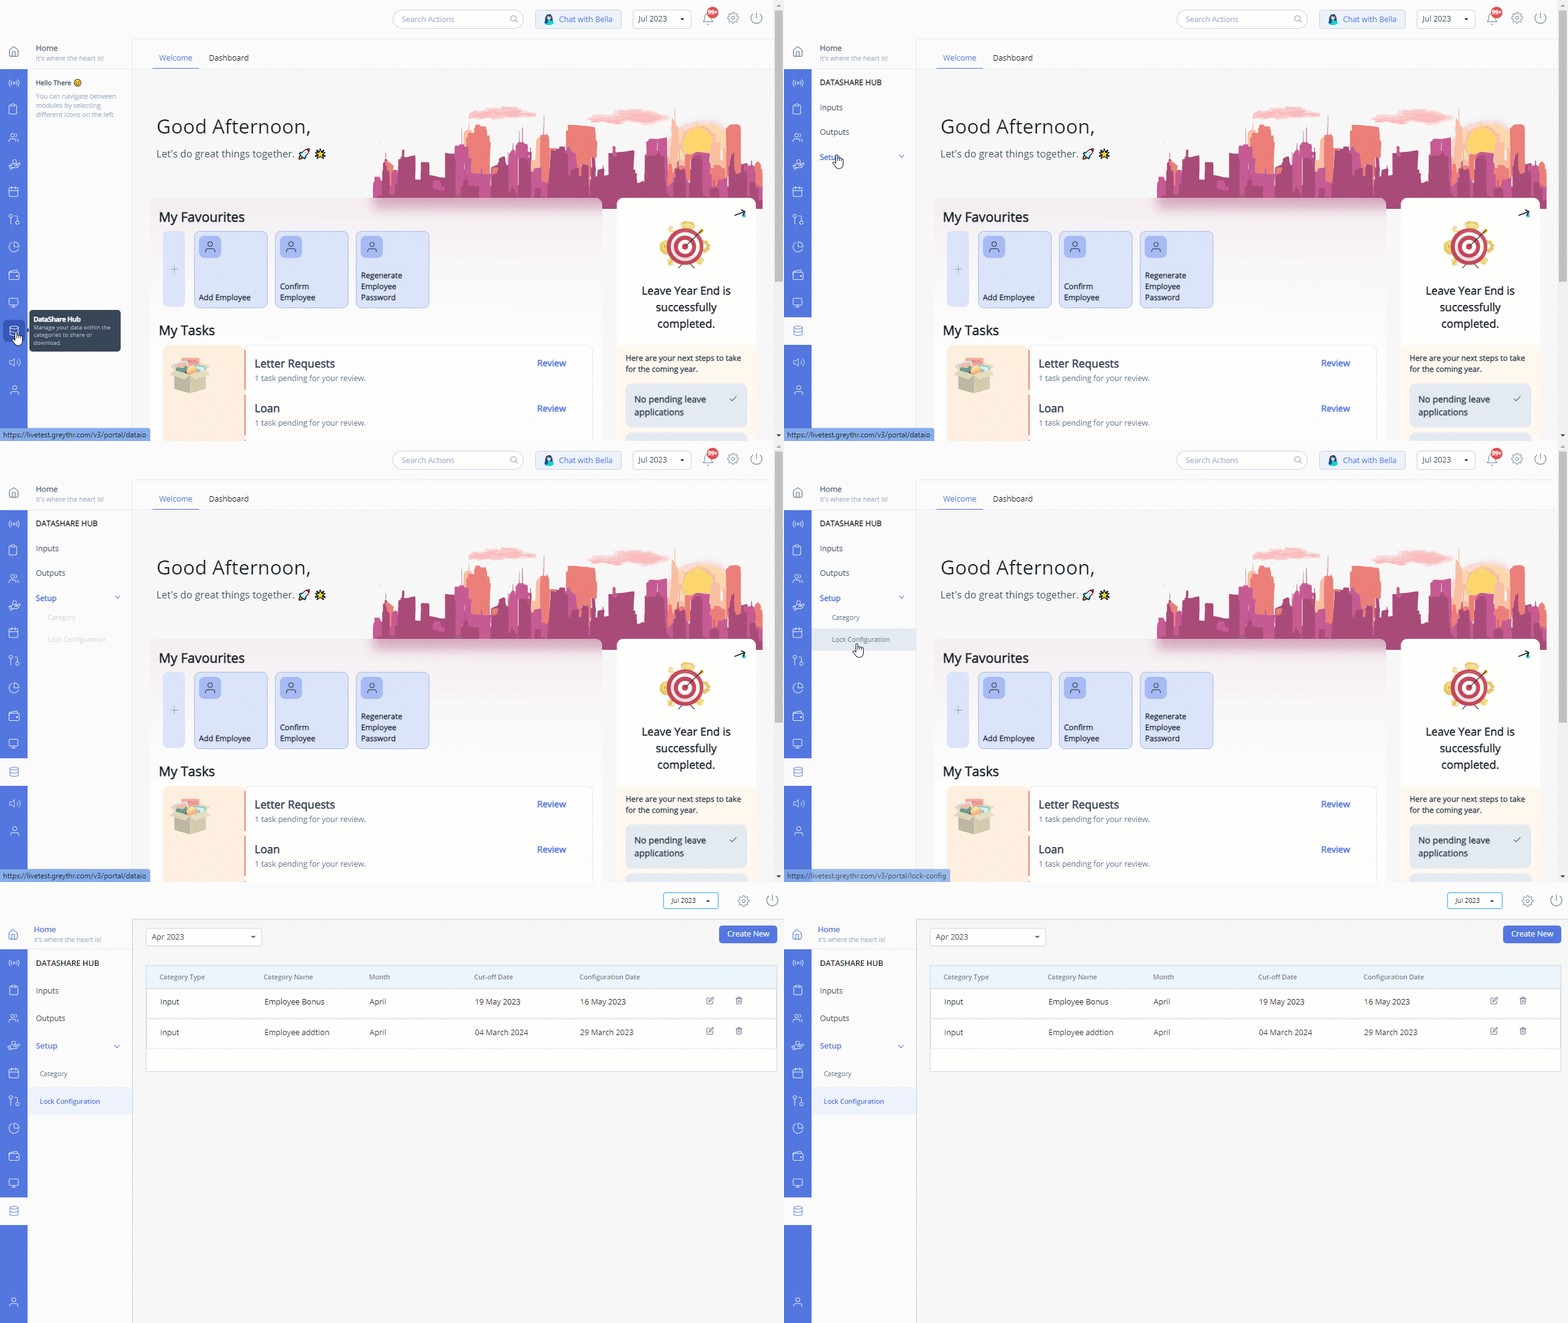
To view the Lock Configuration page, navigate to DataShare Hub > Setup > Lock Configuration.

The page displays a list of categories for which you have set a cut-off date. You can perform the following actions on the Lock Configuration page:
Configure the cut-off date.
Edit/Delete the cut-off date.
Configure the cut-off date
To configure the cut-off date for a category, perform the following actions:
From the greytHR Admin portal, navigate to DataShare Hub > Setup > Lock Configuration.
On the Lock Configuration page, click the Create New button. A form appears.
From the Category Type dropdown list, select the Input/Output option as per your requirements.
From the Category dropdown list, select the required category for which you want to set the cut-off date.
Note: You can set the cut-off date for all categories at a time by selecting the Select All option from the Category dropdown list.From the Payroll Month dropdown list, select the required payroll month for the category.
From the Cut-off Date dropdown calendar, select the required cut-off date for the selected category.
Click Save to configure the cut-off date.
Note: The category is locked after the configured date is due. You can also lock the category manually. To learn how to lock the category manually, click here.
Edit/Delete the cut-off date
To edit/delete a cut-off date, perform the following actions:
From the greytHR Admin portal, navigate to DataShare Hub > Setup > Lock Configuration.
On the Lock Configuration page, from the month dropdown list, select the required month. The table appears.
Click the Edit icon available next to the Configuration Date column. A form appears.
Edit the cut-off date as per your requirements.
Click Save to edit the cut-off date.
Note: To remove the automatic cut-off date from a category, click the Delete icon available next to the Configuration Date column.
After configuring the cut-off date, customers can view and share the data inputs with you. After receiving the data inputs, you must now use the inputs to take appropriate action.
Other related links:
Was this article helpful?
More resources:
▶ Video - Watch our how-to videos to learn more about greytHR.
❓ FAQs - Solve your queries using FAQs.
📢 Product Update - Read about the product updates.