Setup and track clients’ payroll calendar using greytHR PRO
Updated in September - 2024 | Subscribe to watch greytHR how-to video
Payroll schedule management helps PSPs to schedule and track payroll tasks. It ensures meeting Service Level Agreements (SLAs) with clients. This feature prevents breaches and associated penalties.
Set up a pay policy.
Schedule payroll calendar using Payroll Scheduler.
Manage payroll schedules and track milestones with Workcenter.
Set up a pay policy
It is important for you as PSPs to set up a pay policy to configure details for each of your clients such as frequency of the payroll process, day of payment, off-days, and start day in case of weekly and biweekly.
To set up a pay policy, perform the following actions:

From the greytHR PRO account, navigate to Clients > Manage Clients. The Clients page opens.
Select and click the required Client account. The Client Details page opens.
Click the Pay Policy tab. The tab expands.
From the Pay Frequency dropdown list, select the required option.
From the Select your off days options, select the off days during which salary will not be disbursed and milestones will not be set.
From the Select your payday dropdown list, select the day of salary disbursement.
Click Submit to set up a pay policy. A success message appears.
Schedule payroll calendar using Payroll Scheduler
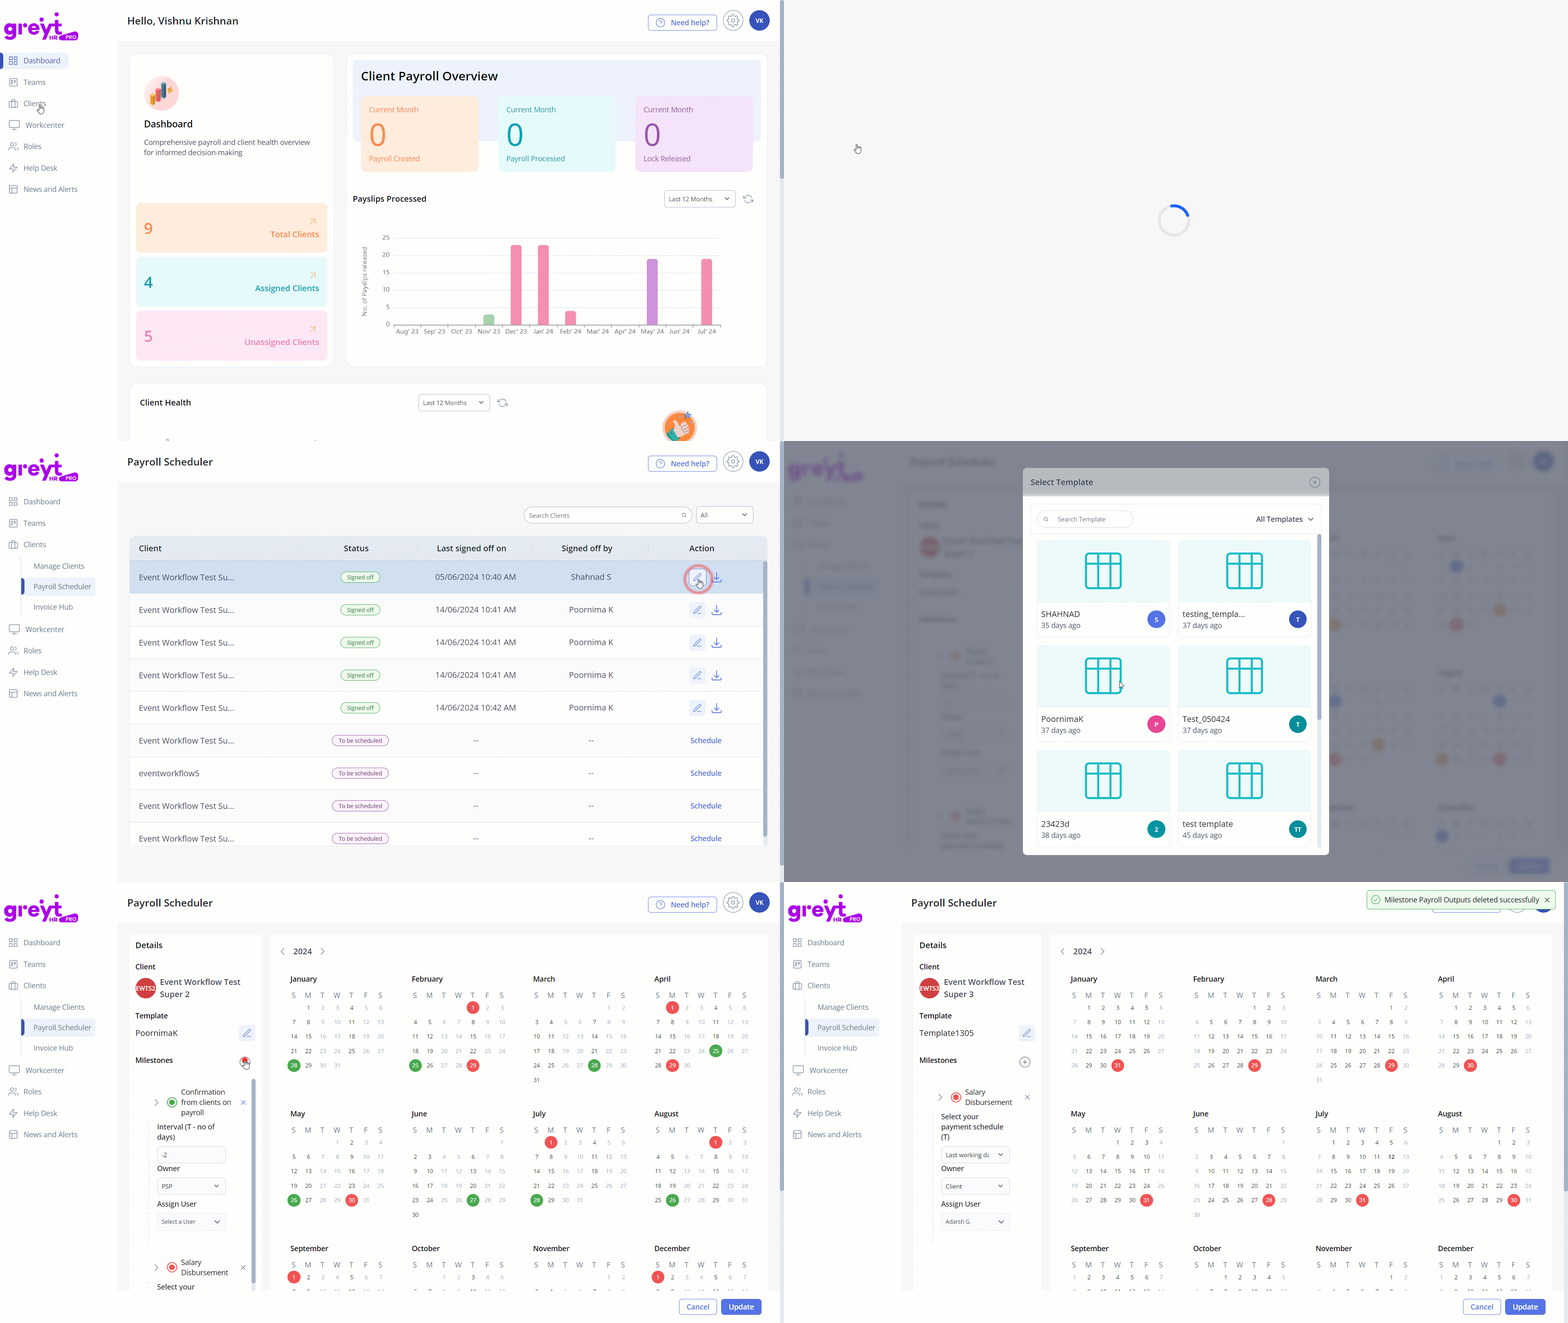
The Payroll Scheduler allows you to set a payroll schedule for each client based on the agreed-upon SLAs (Service Level Agreements). This schedule will continue weekly or monthly, depending on the pay policy, until a new SLA is signed. Before scheduling payroll, you must compulsorily configure the Pay Policy. The Payroll Scheduler schedules the payroll activities as per the selections made in the pay policy.
Scheduling a payroll calendar includes the following steps:
Identifying the various tasks required for each payroll cycle and designating these tasks as Milestones.
Determining the cutoff date for each milestone.
Appointing an Owner for each milestone.
To set a payroll schedule, perform the following actions:

From the greytHR PRO account, navigate to Clients > Payroll Scheduler. The Payroll Calendar page opens.
Select the required client account row and click Schedule available on the row. The Select Template pop-up appears.
Select Start from blank or any other existing template as per your requirements. The Payroll Calendar page opens.
Under the Details column, click the Milestones + icon to select a milestone. The milestone displays options as per your selection. For example: Salary Disbursement.
Note:You can customize your milestones as per your requirements.
You can move your milestones before or after the Salary Disbursement milestone depending on when you want to schedule it.
You can also select the number of days before or after Salary Disbursement which you would like to schedule each milestone.
In the Select your payment schedule(T) dropdown list, your input for payday in Pay Policy will be automatically reflected.
From the Owner dropdown list, select PSP/Client as per your selected milestone.
Note: You can preview the changes made to the milestones in the Calendar displayed on the page.From the Assign User dropdown list, select the required user.
Click Save.
The Name Template pop-up appears.
In the Template Name text box, enter the template’s name.
Click Confirm.
Click Save. You will be redirected to the Payroll Calendar page
Note:
The Status for the client shows as Pending.
Click the Download icon to display and get approval of the drafted payroll scheduler or calendar from the client.
Click Mark as complete if approved by the client. The Status changes to Signed off.
You can click the Edit icon available on the client row to make any updates.
Navigate to the Settings icon > Templates to create or use an existing template for the Payroll Scheduler.
Manage payroll schedules and track milestones with Workcenter
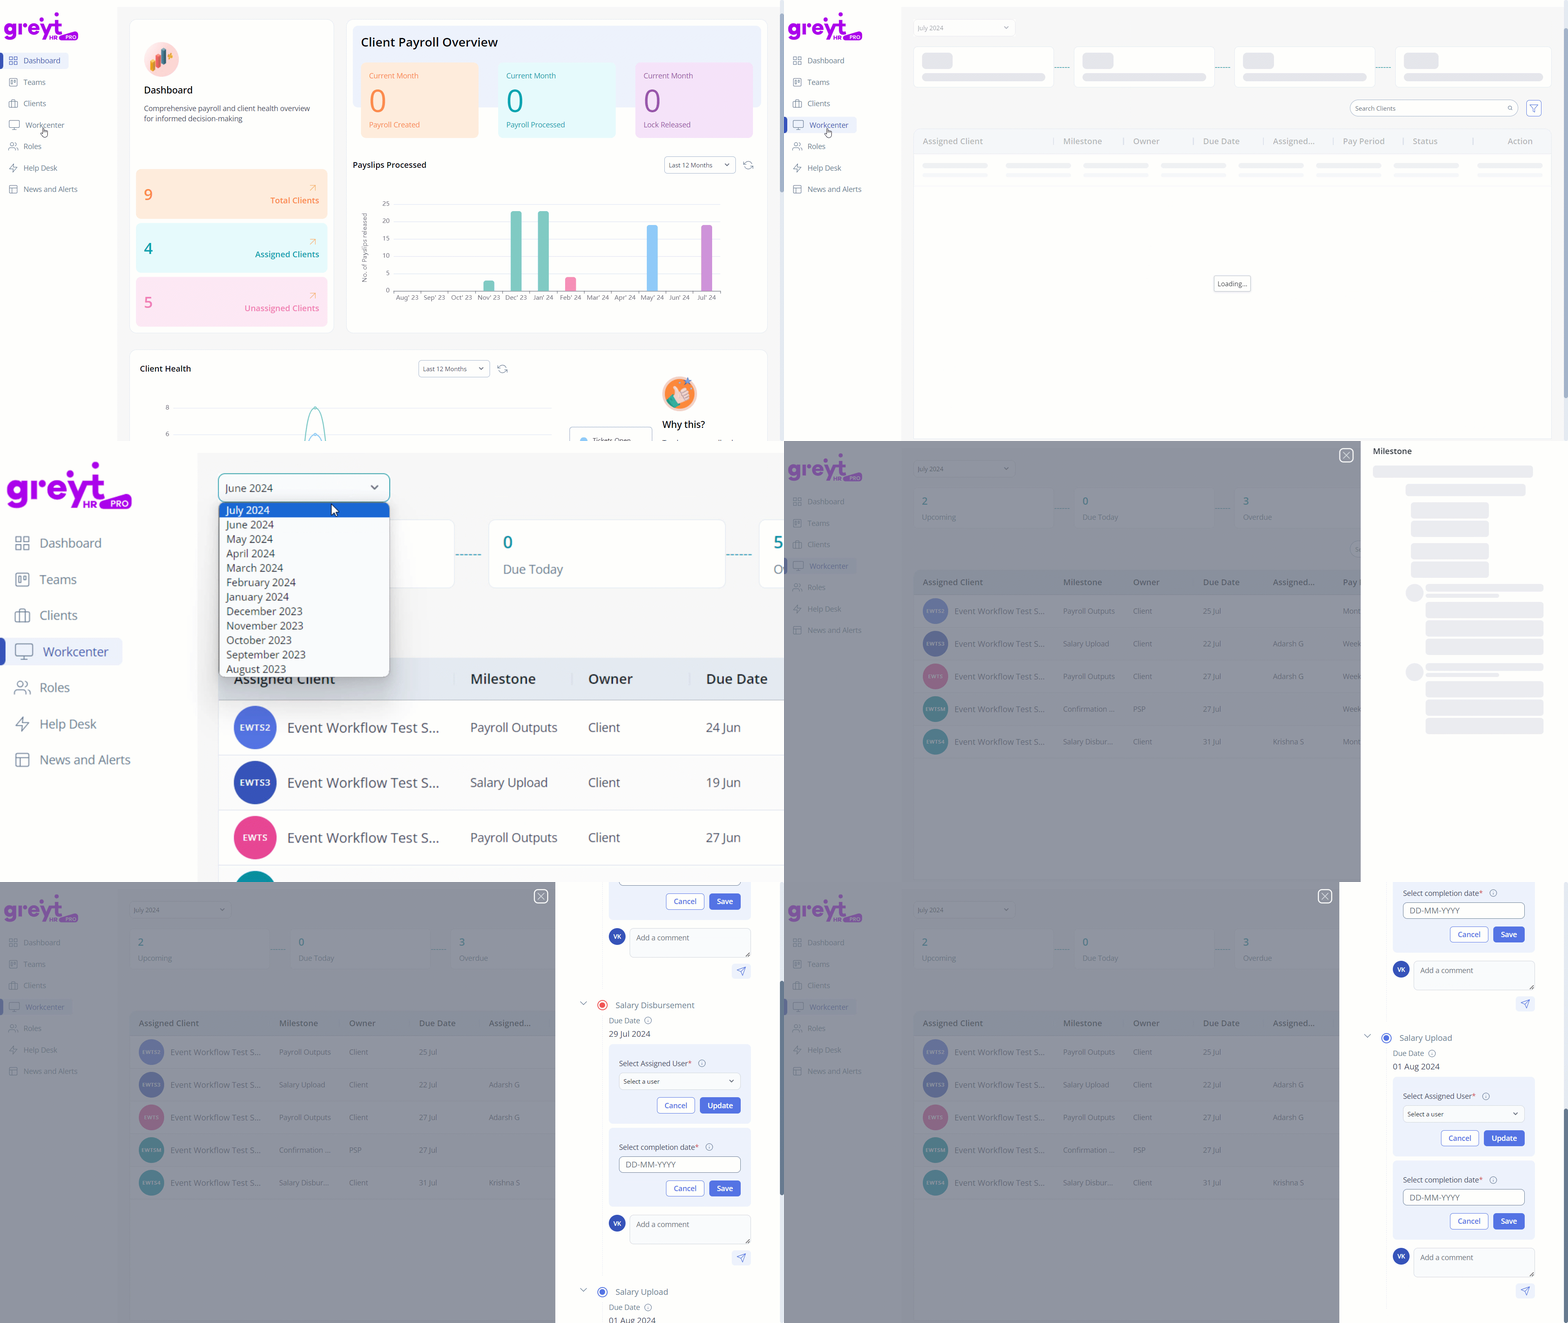
Workcenter within greytHR PRO tracks and updates the milestones to be completed for various clients for each pay period. The information in Workcenter auto-populates based on the payroll calendars set up in the Payroll Scheduler.
To track and complete the milestones, perform the following actions:

From the greytHR PRO account, navigate to Workcenter. The Workcenter page opens.
From the month dropdown list, select the month for which you want to complete the milestone.
Note: After you select the month, you can view the Upcoming, Due Today, Overdue, and Completed milestones for the selected month.From the Assigned Client column, select the required client and click View Details. The Milestone pop-up appears.
Select the required milestone and from the Select completion date dropdown calendar, select the completion date.
Click Save. A success message appears.
In the Add a comment textbox, add a comment for reference. You can also edit or delete the comment.
Note: Access to Workcenter details are role-based. Following are the roles:
PSP admins can monitor the milestones of all clients.
PSP associates are limited to viewing only the milestones assigned to them.
PSP managers can access milestones assigned to them and their team members.
Other related links:
Was this article helpful?
More resources:
▶ Video - Watch our how-to videos to learn more about greytHR.
❓ FAQs - Solve your queries using FAQs.
📢 Product Update - Read about the product updates.