Grant leave to employees
Updated in December- 2025 | Subscribe to watch greytHR how-to video
As the leave year wraps up and the holiday calendar is finalized, the next crucial step is granting leave. Granting leave involves setting up each employee’s annual leave entitlement according to company policy. This ensures the employees start the new year with their allotted leave balance.
By granting leave, employees can easily view and request their time off as needed, creating a smooth, organized, and transparent time-off process for both employees and the HR team. This foundation keeps everyone informed and helps the team manage time-off requests efficiently throughout the year.
Let us see how the admins grant leave manually.
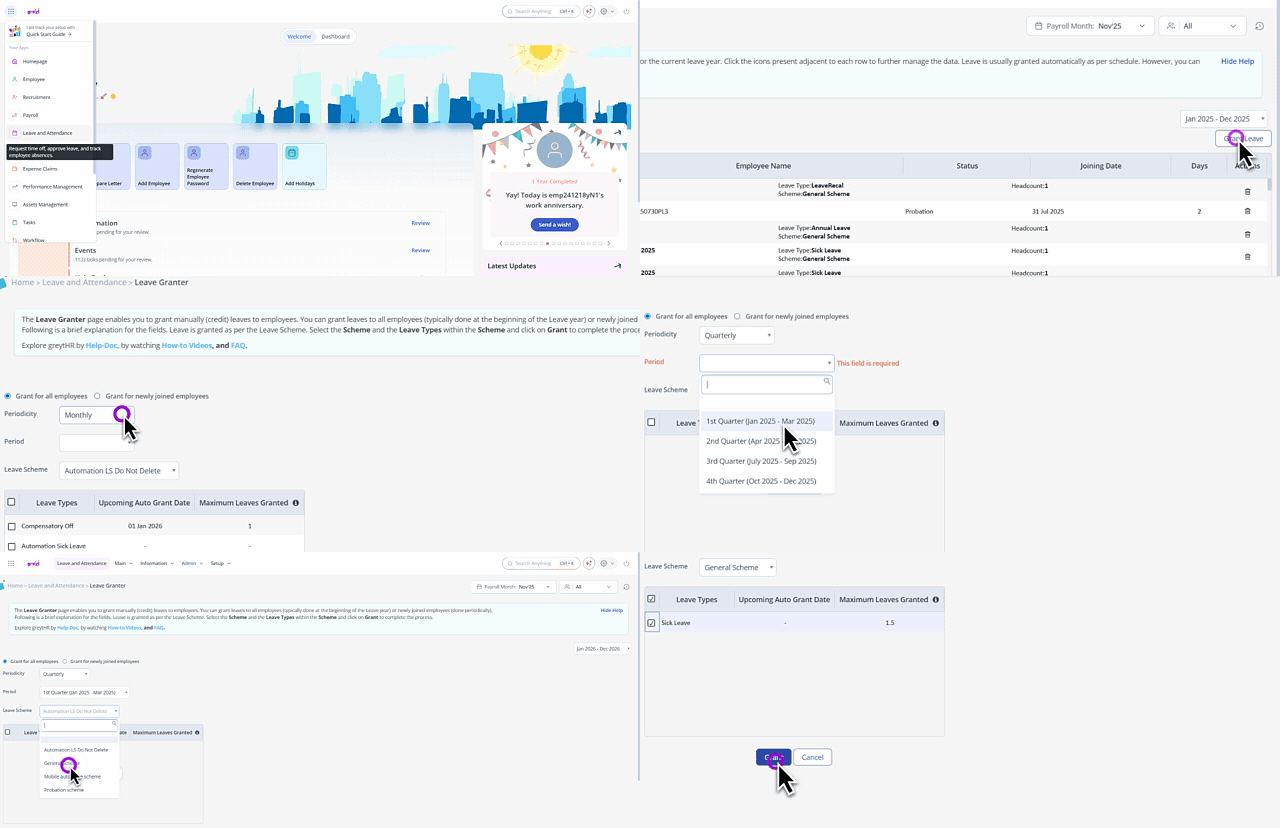
To grant leave manually to the employees, from the greytHR Admin login, hover over the 9 dots and go to Leave and Attendance > Admin > Leave Granter.

Click Grant Leave.
Select Grant for all employees or Grant for newly joined employees.
Select a frequency from Periodicity (Monthly, Quarterly, Half-Yearly or Yearly), Period, and Leave Scheme. Note: If multiple schemes exist, repeat for each scheme.
Select the Leave Types and click Grant to confirm.
Delete leave batches: Use the Delete icon in the Actions column on the leave batch card.
Delete individual employee leave: Use the Delete icon in the corresponding row for the employee within the leave batch card.
Other related links:
Was this article helpful?
More resources:
▶ Video - Watch our how-to videos to learn more about greytHR.
❓ FAQs - Solve your queries using FAQs.
📢 Product Update - Read about the product updates.