Add candidates to job
Updated in May - 2026| Subscribe to watch greytHR how-to video
As a recruiter admin, you can add candidates to job positions, facilitating the recruitment process. The Candidates page in the greytHR Recruit portal allows you to view all the candidates uploaded across various jobs and projects.
Candidate Management
The Candidates page in greytHR Recruit centralizes all candidate data, enabling you to:
View uploaded candidates across jobs.
Search by name, email, and apply filters like Location, Experience, Skills, Tags, Source, and Added By.
Add candidates to Recruit
Candidates are added to Recruit when:
A candidate applies directly for a job.
An agency submits a candidate’s profile.
Hiring team members manually add a candidate.
Applications come in from jobs listed on the Career page.
Listed staffing agencies submit candidates.
Resumes arrive as applications to published jobs.
Add candidates to a job
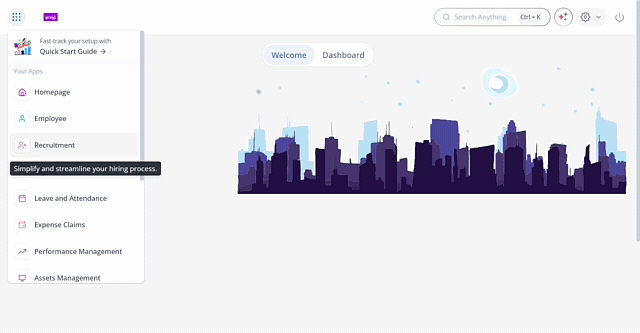
To add a candidate to a job from the greytHR Admin portal, hover over the 9 dots and go to Recruitment > Jobs.
Select the required job and click the selected job card.
Click +Add Candidates.
Select the required candidate’s resume from your computer database.
Click Upload.
Note:
When a candidate details with the same email ID or phone number is uploaded again, the system updates the existing profile with the latest resume instead of creating a duplicate record. If the candidate already exists in the database and is added to a different job, the system will automatically associate the candidate with the newly selected job.
To edit the candidate's profile, schedule an interview, and send a message click the Kebab icon on the candidate’s card.
Click Add Tag to add a tag.
Selecting the required candidate using the checkbox allows you to perform actions such as changing status, prescreening, creating and sending an offer document, sending a message, blacklisting, asking for feedback, and bookmarking the candidate.
Edit candidate’s information
To edit the candidate’s information from the greytHR Admin portal, hover over the 9 dots and go to Recruitment > Candidates.
From the Candidate Pool list, select the required candidate and click the Edit icon available on the right side of the page.
Click Save.
Alternatively, you can edit the candidates's information from the Jobs page as well. You can add the Experience, Skills, and Tags from here.
Select a job. Under Card view or Grid view, click on the Edit icon next to the candidate's name to add the relevant Skills and Tags. Once done, click Update Candidate.
Understand a candidate’s profile
To understand the information on the candidate’s profile, from the greytHR Admin portal, hover over the 9 dots and go to Recruitment > Candidates > select the required candidate > click the Jobs tab available on the right side of the page, and click ➡.
Let us now explore each of these tabs:
Profile Mapping: Displays matching skills from the candidate's resume and job description.
Prescreening: Tracks conversations with Lisa (AI) during pre-screening, which can be initiated here. Recruiters can also chat with candidates and address queries.
Interviews: Lists interview details, including date, time, interviewer, and feedback status. Candidates can send reminders for feedback submission.
Offer: Displays offer-related tasks like creating, uploading, and sharing offer documents with candidates.
Forms: Tracks assigned forms, their review status, and progress.
Messages: Contains all messaging history. Recruiters can email candidates using pre-loaded or custom templates, keeping all messages private.
CANDIDATE STATUS: Displays the candidate's current status and allows status updates via dropdown.
Duplicates: Lists duplicate applications with details like source, job title, and submission time.
Profile Details: This section displays details such as Application ID, Experience, Profile last updated, Sourced from, Added, and Attachments.
Other Details: This section displays information such as Tags and Comments.
Tags: Add private tags to categorize candidates and simplify searches.
Comments: Add notes visible to others or mark them private. Notes can be edited or deleted.
Custom Fields: This section allows companies to add custom fields to the candidate’s profile page. These fields are useful to capture job-specific information on each candidate's profile which might not be available on the resume. These fields are added at the overall organization level from the Candidate Fields section under Company settings on the Settings page. The visibility of these fields is set to either the Hiring team (for sensitive data) or to everyone. Users (recruiters) use this section to enter job-specific information after collecting it from the candidate.
Perform bulk actions on candidates
Performing bulk actions helps you speed up manual tasks, organize the candidate database, and enable faster recruiting. Bulk actions can be performed on candidates from:
Candidate listing under a given job
Candidates Page (overall talent pool)
Candidate listing under a given job
After selecting the candidate, the following are the key bulk actions:
Send message: Send bulk messages using templates or custom drafts.
From the greytHR Admin portal, hover over the 9 dots and go to Recruitment > Jobs.
Click the required job card and select the candidates by the candidate's name or by clicking Select All.
Select Send Message. The Compose a message pop-up appears with a pre-populate To field.
Note: You can either compose your message or select an existing template using the Use a Template option.Add the details and click Send.
Initiate prescreening: Initiate automated prescreening through email/SMS.
From the greytHR Admin portal, hover over the 9 dots and go to Recruitment > Jobs.
Select the candidates and then select Initiate prescreening. The Prescreening tab on the Candidate Profile page shows the status as Candidate has been notified. It also shows how long ago the pre-screening was initiated.
Offer: Send offer documents in bulk.
From the greytHR Admin portal, hover over the 9 dots and go to Recruitment > Jobs.
Select the candidates and click the Offer button available at the bottom of the page.
Select the option Create Offer Document or Send Latest Offer Document as per your requirements.
Note:Create Offer Document option allows you to create the offer document using the templates and associated placeholders.
Send Latest Offer Document option allows you to send the approved offer documents in bulk to the selected candidates.
If an offer document is not generated for a candidate or if the latest offer document approval is pending or rejected, then a message with the offer document is not sent to the candidate.
Change Status: Update candidate status (Example: Prescreened, Interview Scheduled).
From the greytHR Admin portal, hover over the 9 dots and go to Recruitment > Jobs.
Select the candidates and click Change Status to select the status.
Reject: Notify candidates of rejections with reasons.
From the greytHR Admin portal, hover over the 9 dots and go to Recruitment > Jobs.
Click the required job card.
Select the candidates and click the Reject button available at the bottom of the page.
Add reason for rejection and Notify the Candidate.
More: Select the More button available at the bottom of the page. A list opens displaying the following options:
Share candidate info with external stakeholders.
Bookmark or blacklist candidates.
Request feedback or send application forms in bulk.
Candidates page (overall talent pool)
You can perform bulk actions on candidates from the Candidates page (across all jobs). Following are the bulk actions that you can perform after selecting the candidates:
Add to Job: Click Add to Job to add the selected candidates to the required job.
Message: Click the Message icon to send messages to the selected candidates.
Delete candidates
Recruiters, can delete outdated or incorrect candidate records directly from the Candidate Pool page.
You can delete candidates in two ways by navigating to the Candidates page.
Delete candidates in bulk
From the greytHR Admin portal, hover over the 9 dots and go to Recruitment > Candidates.
Select the checkbox to select multiple candidates listed in the page.
Click the Delete button appeared on the top and confirm.
Delete candidates individually
From the greytHR Admin portal, hover over the 9 dots and go to Recruitment > Candidates.
On the Candidates page, select the candidates you want to delete and click the Kebab icon.
Click Delete Candidate and confirm.
Note: Deleting a candidate will permanently remove all associated information, including profile details, resume, interview records, and offer details.
Download candidates resume in bulk
The Download Center in the candidates page helps users to manage large resume downloads without overloading the system or interrupting their work.
When multiple candidate resumes are selected for download, the system prepares the files in the background and provides a real-time view of their download status.
The Download Center has two tabs:
New – Displays resumes that are currently being prepared or are ready for download.
Downloaded – Shows all previously downloaded resume files that were processed within the last 30 days.
Initiate resume download
From the greytHR Admin portal, hover over the 9 dots and go to Recruitment > Candidates.
On the Candidates page select multiple candidates using the checkboxes and click Download Resume icon.
Note: While the button says “Download,” the system first prepares the files—it does not immediately download them to your device.Click Download Center icon available on the right hand side of the page.
Click New tab to find the files you downloaded using Download Resume.
Click Downloaded section and select the Download icon to download the resume.
If all resumes are successfully processed, click Download to get the ZIP file. If there are any errors (e.g., corrupted files or failures), you’ll see:
Download Available – For resumes successfully prepared.
Retry – For failed ones.
Note:
Files in the New tab are stored for 24 hours.
If not downloaded within 24 hours, they move to the Downloaded tab automatically.
Files in the Downloaded tab are retained for 30 days.
After 30 days, all downloaded files are automatically deleted.
Frequently Asked Questions:
What is the Candidate Pool in greytHR Recruit?
The Candidate Pool is a centralized repository that stores all candidates uploaded across jobs and projects. It helps recruiters search, filter, and manage candidates from a single location.
How are candidates added to greytHR Recruit?
Candidates can be added through direct job applications, the Career Page, staffing agencies, manual uploads by recruiters, and resumes submitted to published jobs.
How can I search for a specific candidate?
You can search by candidate name or email and apply filters such as Location, Experience, Skills, Tags, Source, and Added By.
How can I add candidates to a job?
To add a candidate to a job from the greytHR Admin portal, hover over the 9 dots and go to Recruitment > Jobs.
Select the required job and click the selected job card.
Click +Add Candidates.
Select the required candidate’s resume from your computer database.
Click Upload.
What happens if I upload a candidate who already exists in the system?
If the same email ID or phone number already exists, greytHR Recruit updates the existing profile with the latest resume instead of creating a duplicate record.
What happens if I add an existing candidate to another job?
The system automatically associates the existing candidate profile with the selected job.
Can I edit candidate details after uploading the resume?
Yes. You can update information such as experience, skills, tags, comments, and custom fields from the Candidates page or the Jobs page.
To edit the candidate’s information from the greytHR Admin portal, hover over the 9 dots and go to Recruitment > Candidates.
From the Candidate Pool list, select the required candidate and click the Edit icon available on the right side of the page. The Edit Candidates Details form opens.
On the left side of the Edit Candidates Details form, edit the required details of the candidate. you can also add experience, tags and skills.
Click Update Candidate.
What information can I view in a candidate’s profile?
The candidate profile includes Profile Mapping, Prescreening, Interviews, Offer, Forms, Messages, Candidate Status, Duplicates, Profile Details, Tags, Comments, and Custom Fields.
What does the Profile Mapping tab show?
It compares the candidate’s resume with the job description and highlights matching skills.
What does the Prescreening tab display?
It shows AI-based prescreening conversations and the current prescreening status.
Can I schedule and track interviews?
Yes. The Interviews tab displays interview dates, times, interviewer details, and feedback status.
Can I send reminders for pending interview feedback?
Yes. Recruiters can send reminders to interviewers to submit pending feedback.
Can I create and send offer letters from greytHR Recruit?
Yes. You can create, upload, approve, and send offer documents directly from the Offer tab.
Can I assign forms to candidates?
Yes. You can send forms and track their completion and review status from the Forms tab.
Can I send messages to candidates?
Yes. You can send emails using templates or custom messages, and all communication is stored in the Messages tab.
Can I add tags and comments to a candidate profile?
Yes. Tags help categorize candidates, and comments can be shared with the hiring team or kept private.
Can I configure custom fields in candidate profiles?
Yes. Admins can add custom fields to capture additional job-specific information.
Can I update a candidate’s status?
Yes. You can update the candidate’s status individually or in bulk.
Can I perform bulk actions on candidates?
Yes. You can send messages, initiate prescreening, change status, create and send offers, reject candidates, bookmark, blacklist, request feedback, send forms, and download resumes.
Can I bookmark candidates for future reference?
Yes. Bookmarking helps you quickly identify promising candidates.
Can I blacklist candidates?
Yes. Blacklisting prevents candidates from being considered for future openings.
Can I share candidate information with external stakeholders?
Yes. You can share candidate details using the More option.
Can I reject multiple candidates at once?
Yes. You can reject candidates in bulk and optionally notify them with a rejection reason.
Can I add selected candidates to another job?
Yes. From the Candidates page, select the candidates and click Add to Job.
Can I delete candidates from the Candidate Pool?
Yes. You can delete candidates individually or in bulk.
Can deleted candidates be restored?
No. Candidate deletion is permanent and cannot be undone.
Can I download multiple resumes at once?
Yes. The system prepares selected resumes in the background and packages them into a ZIP file.
What happens if some resumes fail to process?
The Download Center displays a Retry option for failed files.
How does the Download Center help?
It lets you track resume preparation and access previously processed downloads.
How long are downloaded resume files retained?
Files remain in the New tab for 24 hours and in the Downloaded tab for 30 days before being automatically deleted.
Can I continue working while resumes are being prepared?
Yes. Resume preparation runs in the background without interrupting your work.
Who can manage candidates in greytHR Recruit?
Recruiters and authorized hiring team members with the required permissions can manage candidates.
Related articles:
Was this article helpful?
More resources:
▶ Video - Watch our how-to videos to learn more about greytHR.
❓ FAQs - Solve your queries using FAQs.
📢 Product Update - Read about the product updates.